Artikel: How to Choose Mat Borders for Paper Posters

How to Choose Mat Borders for Paper Posters
How to Choose Mat Borders for Paper Posters
The right mat border gives paper posters breathing room, separates the image from the frame and makes a modest print feel deliberately displayed. The wrong border can crowd the composition, compete with its colors or hide lettering you wanted to keep visible.
Choosing well comes down to four decisions: border width, opening size, color and conservation materials. Whether you are framing a vintage airline design or building a transport-themed gallery wall, start with the artwork itself rather than whatever frame happens to be available.
What a mat border actually does
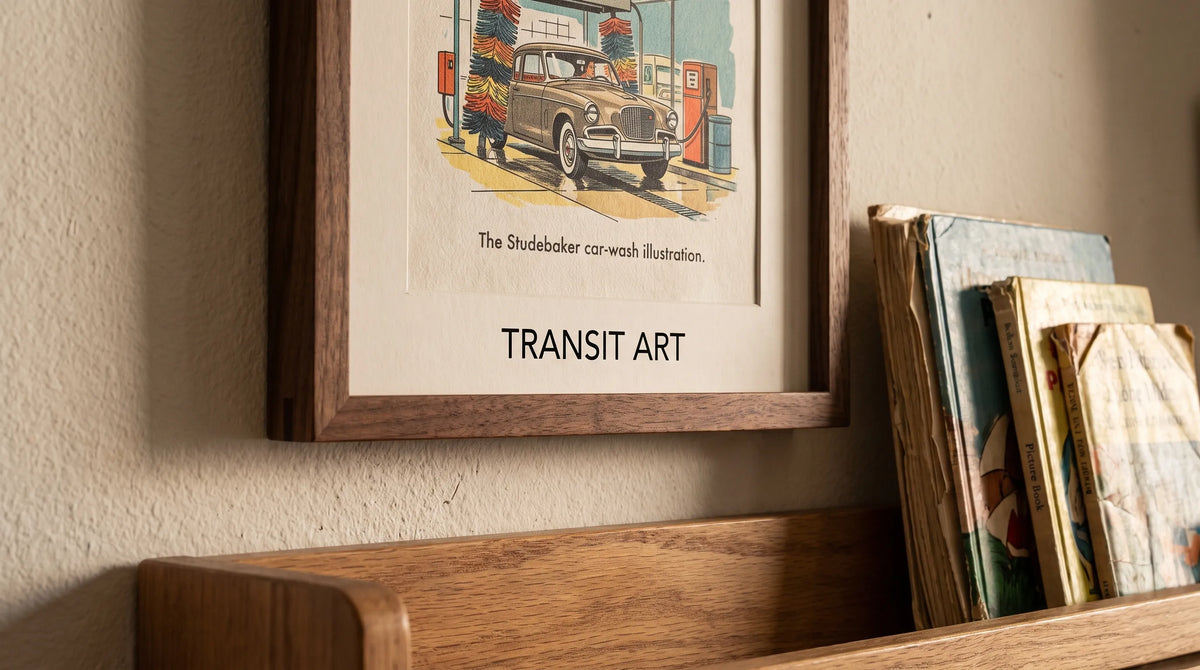
A window mat is a board with an opening cut into it, placed over a work on paper. Its visible border creates a transition between the image and the frame. In a glazed frame, it also helps separate the paper from the glass or acrylic, although the complete framing package must provide sufficient clearance.
That visual pause matters with transport art. Illustrated aircraft, racing scenes and vintage advertising often contain strong diagonals, detailed backgrounds or prominent typography. A mat gives those elements room to register without running straight into a heavy frame.
A mat is optional, not a quality requirement. An edge-to-edge composition may look better without one. If you choose that approach, ask your framer about spacers so the artwork does not rest against the glazing.
Choosing mat widths for paper posters
There is no universal border width. As a practical starting point, try approximately 2 to 3 inches around a small or medium print, then adjust for the composition and the available wall space. These are design suggestions, not conservation standards.
A narrow border feels compact and graphic. A wider border creates more separation and can help a small image hold its own above a desk or console. However, increasing the border also increases the finished frame size.
The examples below use the visible opening, not the sheet size, and assume equal borders on all sides.
| Visible opening | Border on each side | Outside mat dimensions |
|---|---|---|
| 8 × 12 inches | 2 inches | 12 × 16 inches |
| 12 × 18 inches | 3 inches | 18 × 24 inches |
| 16 × 24 inches | 3 inches | 22 × 30 inches |
These are illustrative measurements, not Transit Art product sizes. Frame molding adds to the overall wall footprint.
Measure the opening before ordering
For paper posters, the opening must be planned around both the sheet dimensions and the content you want visible. A window mat usually overlaps the paper slightly to conceal its edges and help keep it positioned within the mounting arrangement.
An overlap of roughly ⅛ to ¼ inch per edge is a common starting point, but it must not cover important lettering, signatures or image details. A poster's printed white margin is also different from a separate mat board, so include that margin when judging the final visual border.
Equal borders are the simplest choice. A slightly wider bottom border, often called bottom weighting, can suit vertically oriented work. Test it with a paper mock-up rather than treating it as a rule.
Choose a mat color that supports the artwork
Begin with white, warm white or a restrained neutral. These options let the image remain the focal point and are easier to coordinate across several frames than a collection of strongly colored mats.
Use the artwork's lightest areas as a reference. A bright-white board can make an intentionally aged cream background look dingy, while a very yellow board can muddy a clean contemporary design. Place physical mat samples against the print in the room where it will hang.
For paper posters with strong lettering or busy illustrations, a quiet mat is usually more effective than one that repeats the loudest accent color. Black can create a dramatic enclosure, but it also makes the border more visually dominant.
A double mat introduces another color through a narrow inner reveal. Keep that reveal restrained and test whether it genuinely improves the image. More layers do not automatically produce a more refined result.
Check the materials, not just the color
For longer-term display, ask for conservation-quality, acid-free and lignin-free mat board, commonly made from cotton rag or suitable purified wood pulp. Check the backing board too, since materials hidden behind the artwork still matter.
FSC certification concerns responsible forest sourcing; it does not, by itself, establish that a framing material is suitable for conservation. Transit Art's use of FSC-certified paper and your choice of protective framing materials address different questions.
Avoid ordinary household tape on the print. A professional framer can recommend appropriate hinges or other mounting methods based on the paper and your preferences. The Library of Congress guidance on caring for paper provides useful preservation advice.
UV-filtering glazing can reduce exposure, but it cannot make direct sunlight harmless. Keep framed work away from strong sun, damp walls and sources of heat.
Interior design: make the border fit the room
Mat borders should relate to the room without disappearing into it. In a neutral living room, warm-white matting and a slim wood frame can soften graphic transport imagery. In a home office, white matting with a dark frame can create a more defined focal point.
When arranging several paper posters, consistent mat colors often matter more than identical border widths. Different sheet sizes may require different openings, yet the display can still feel coordinated through shared framing choices. Transit Art's guide to creating a cohesive gallery wall with framed prints explores that broader arrangement.
Before ordering, cut paper templates to the proposed outer frame dimensions and attach them temporarily to the wall. Check the arrangement from the doorway and your usual seated position. This reveals whether the mat has made the finished piece too large for the furniture below it.

Recommended Poster Pairings
A mat can also connect a paper print with artwork in another format. Transit Art's Pan American World Airways Africa Clipper Travel Poster offers an aviation subject to anchor such a display. Its travel-advertising imagery reflects the way airlines presented distant destinations through illustrated posters.
The following pairings combine that paper poster with a canvas artwork. They are mixed-format arrangements, not suggestions to treat canvas like paper or apply the same window mat to every piece.
Africa Clipper with Mercedes-Benz endurance-racing art
Pair the airline poster with The Mercedes-Benz 300 SLR at Le Mans 1955 - canvas for a display about travel, engineering and midcentury transport culture.
The 300 SLR is closely associated with Mercedes-Benz's 1955 sports-car racing program. Juan Manuel Fangio and Stirling Moss shared one at Le Mans that year. The event must also be remembered for the fatal disaster involving another Mercedes entry, after which the team withdrew its remaining cars. The artwork belongs to that complicated history, not a straightforward victory story.
For enthusiasts who appreciate automotive heritage, the racing subject adds historical interest beside an aviation print. Give paper posters in this arrangement a restrained mat, then use compatible frame tones or placement to connect the different formats. A study or reading area suits the pairing without requiring every wall to follow a transport theme.
Africa Clipper with prewar Grand Prix imagery
For a broader timeline, combine the travel poster with German Rivals - canvas, featuring an Auto Union Type D in a racing scene.
Introduced in 1938, the Type D belongs to the prewar Grand Prix era. Its engine sat behind the driver, a distinctive feature of Auto Union's racing approach and a useful point of interest for viewers drawn to engineering history. Its place among the German “Silver Arrows” makes it recognizable to many classic motorsport enthusiasts.
This pairing brings aviation advertising and Grand Prix machinery into the same conversation without requiring matching subjects. It works well along a hallway or above a long sideboard, where each image has room to be viewed separately. Coordinate the display through spacing and restrained framing rather than assuming the two artworks share an identical palette.
Check the full framing specification
Before ordering mats for paper posters, confirm the measurements against the actual print rather than relying on a product thumbnail. A small mistake at the opening can crop text or leave an unintended paper edge visible.
Keep these details together when speaking with a framer:
- The actual sheet dimensions and the image area you want visible.
- The window opening, including the planned overlap.
- The outside mat dimensions and compatible frame size.
- The mat and backing materials, mounting method and glazing clearance.
- The finished outer frame dimensions for your wall layout.
For the two canvas products above, confirm their construction and suitable framing options separately. Paper-matting guidance should not be transferred automatically to canvas.
Frequently Asked Questions
Should the mat be wider than the frame molding? It often looks balanced that way, but it is not a requirement. A very narrow mat beside heavy molding can feel squeezed. Compare samples at their actual widths before deciding.
Can I use the same mat width for every poster? Yes, if the sizes and compositions suit it. For a varied collection, matching the mat color and frame style may create better continuity than forcing every border to have the same width.
Is a white mat always the safest choice? White is versatile, but its temperature matters. Warm white may suit an aged-looking travel design, while a cleaner white may work better with a crisp modern image. Check samples beside the print under your room lighting.
Can I put a poster directly against glass? Avoid direct contact. Use a suitable mat or framing spacers to provide separation, and ask your framer to check the complete assembly.
Give the image enough room
The best mat borders for paper posters support the artwork without becoming the subject. Start with a measured opening, test a restrained color and check the finished size against your wall.
Whether your display centers on aviation, racing history or another personal interest, thoughtful framing helps the collection feel intentional. Choose the artwork you want to live with first, then give it the border and protection it needs.